Free Website Builder That I Can Upload to a Godaddy Domain
If you have started learning about the website building procedure, you have probably already heard the name GoDaddy.
This tech giant offers pretty much everything from selling domains and hosting to offering site builder software and marketing services. GoDaddy is the world's largest web services platform with millions of customers. You can read more about it in our in-depth GoDaddy review.
If you're already a user of their other services, it'southward worth trying out their website builder service too. New users can examination out the website builder solution for costless and if you like information technology you tin can continue to utilise it.
In this guide, I'll prove you the step-by-step process of how to make a website using GoDaddy services.
Building a Free Website on GoDaddy in 7 Like shooting fish in a barrel Steps
Although the website builder is very user-friendly, don't sweat if y'all need some help getting started. Just follow our guide, and yous will have your outset website congenital easily and quickly.
- Step #ane: Create an business relationship to become started
- Step #two: Choose the category of your website
- Step #iii: Choice a name for your website
- Stride #4: Start editing and customizing your site
- Footstep #five: Optimize your website for SEO
- Pace #6: Preview and publish your website
- Footstep #vii: Upgrade to connect a custom domain
Step #1: Create an account to get started
If yous already have an account created on godaddy.com, it is not necessary to create a new 1. Existing customers merely have to log in before choosing a category and getting started with the website editor.
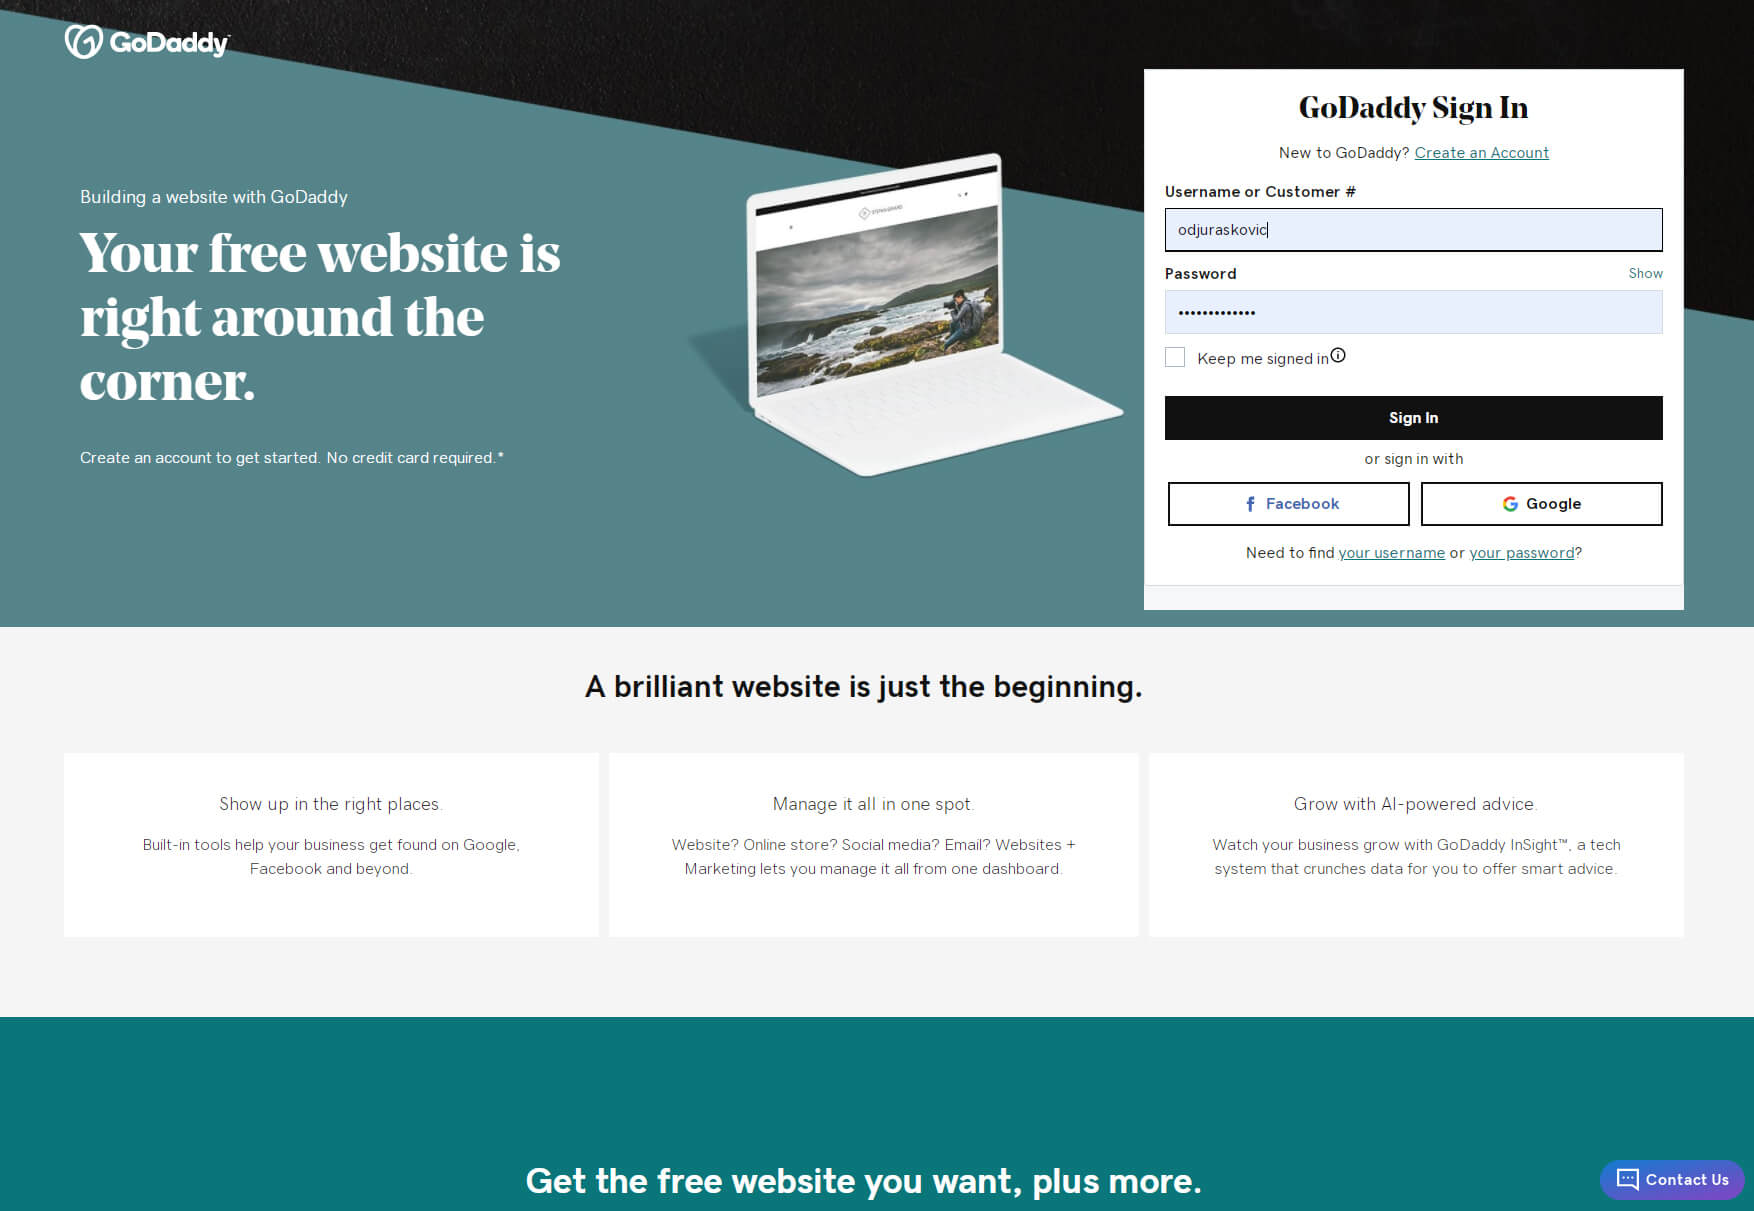
However, if you are a new user, yous tin create a new account in a few seconds. The fastest way to exercise so is to log in to your existing Google or Facebook account. GoDaddy volition and so pull all of the information required and create the account for y'all.
For those of you that do not take one of these accounts or simply do not desire to use them with GoDaddy, it is piece of cake to enter your e-mail address, username, and countersign to get started. There is a costless one-month trial bachelor, and you do non have to enter whatsoever credit card details to start making your free website.
- Get to GoDaddy.
- Enter your email address, desired username, and password.
- Choose to accept or pass up to receive personalized offers.
- Click on the "Create Business relationship" button to become started.
Stride #2: Cull a category of your website
After creating an business relationship or logging in with an existing ane, you lot can commencement building your kickoff site. The starting time stride is to select a category.
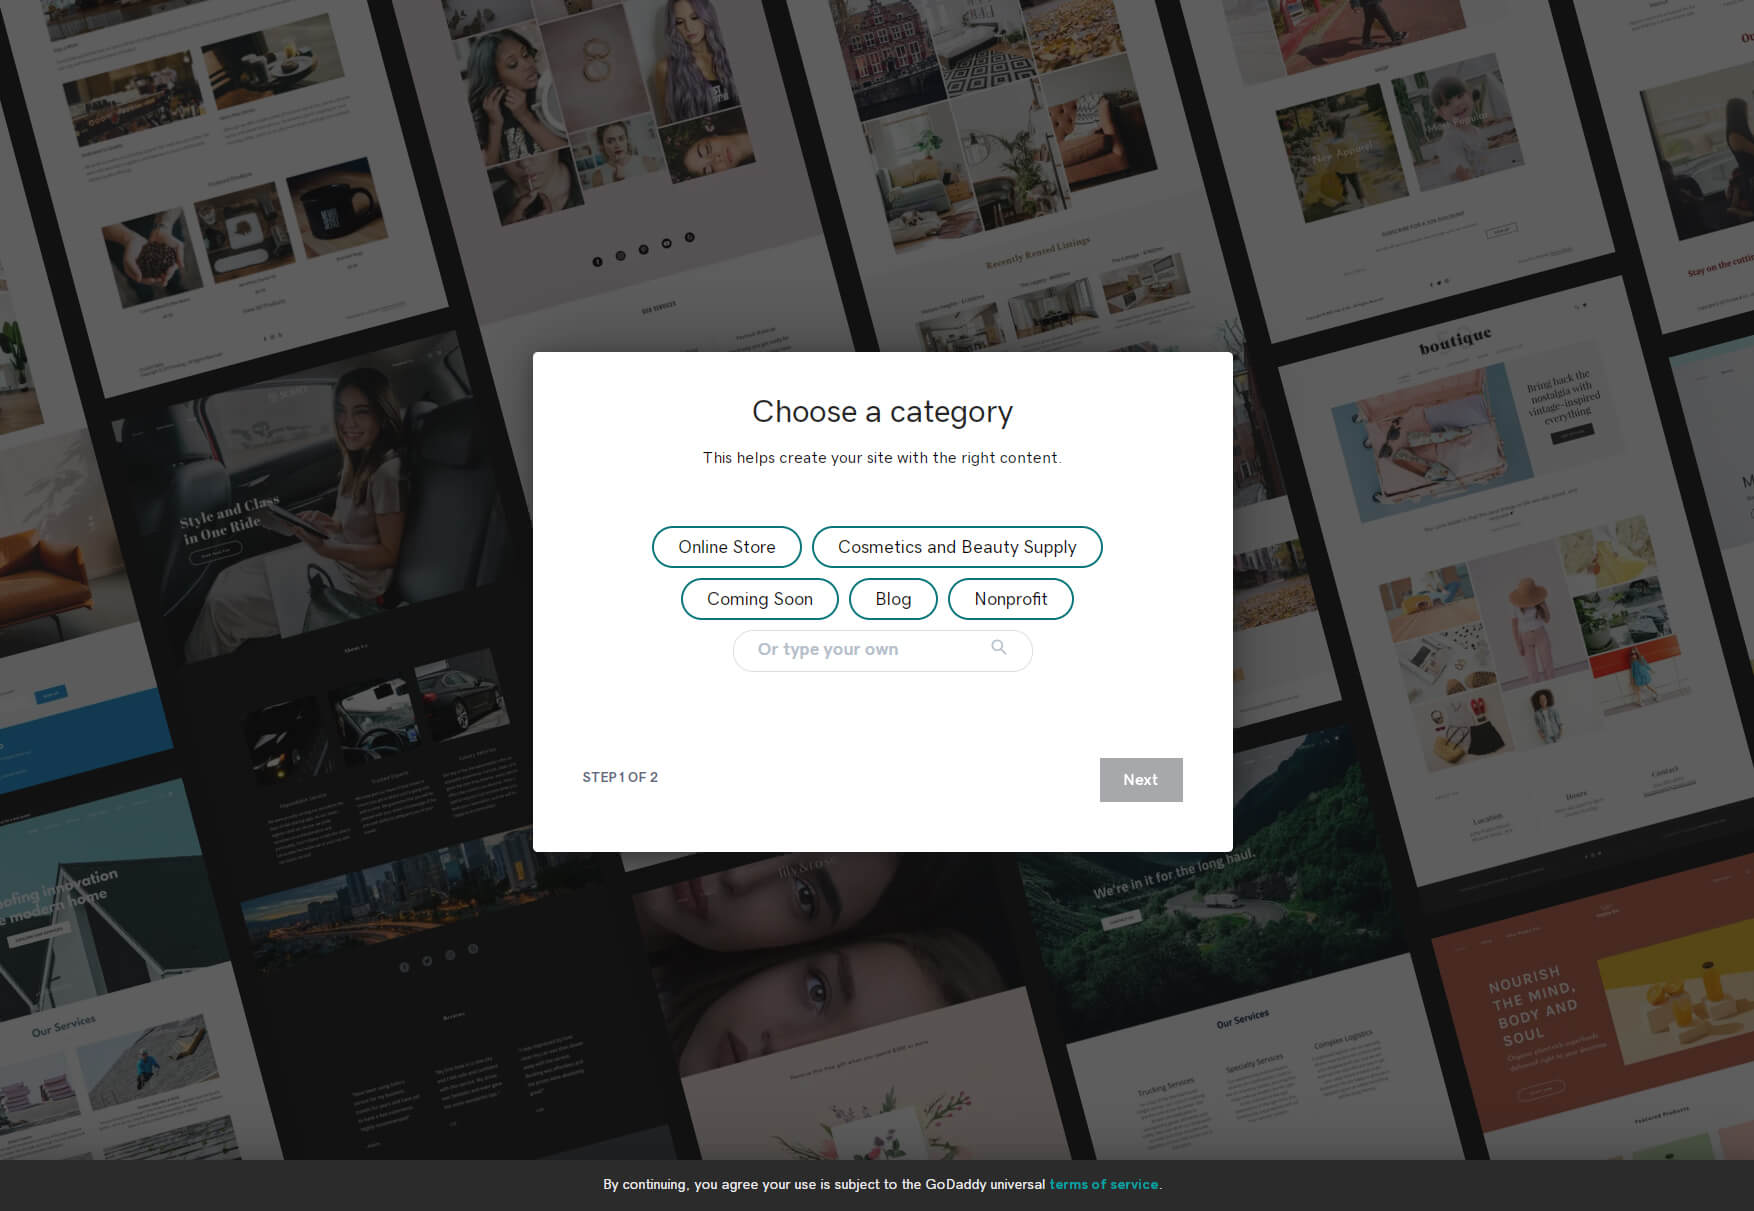
A selection of categories will be provided, only if yous can't see the right one for your website, just enter your category in the field located beneath. While it might not feel essential to select a category at this point, you should know that GoDaddy uses this information to create an optional sample site that could give you the opportunity for a more leisurely showtime.
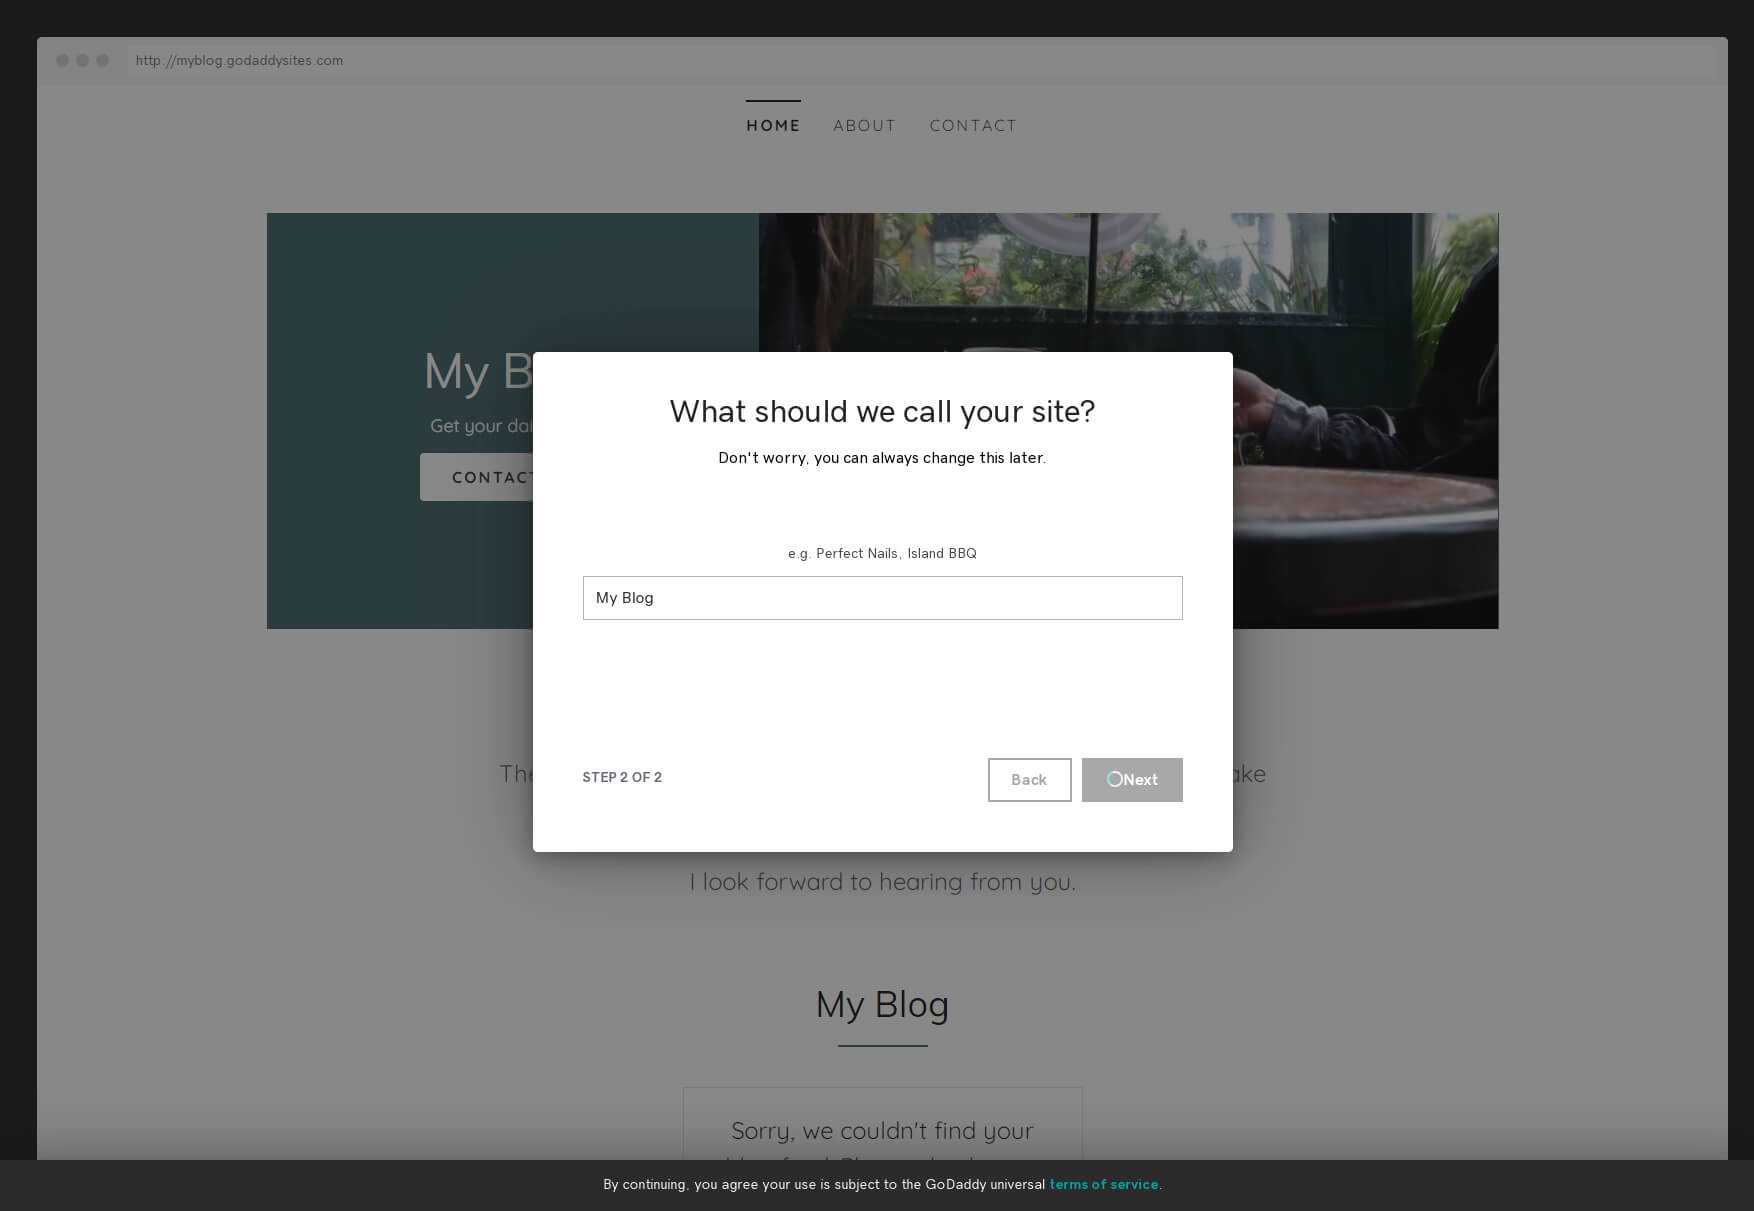
Step #3: Pick a proper noun for your website
Obviously, the proper noun of a website is a crucial footstep. Enter down annihilation you desire, but do not worry if you lot still haven't made a firm conclusion every bit information technology is always possible to change the proper noun of your GoDaddy site from the settings in the future.
Step #4: Start editing and customizing your site
Subsequently clicking the "Adjacent" button, delight wait for a few seconds for GoDaddy to build your website. The results will vary based on your category selection. And this is where the fun part begins – customizing your site and making things personal.
Cull a theme
Choosing a theme should be your showtime step in customizing your site. By clicking on the "Theme" tab located in the top-correct corner of the GoDaddy website editor, you will accept access to several options. You will too notice that the editor zoomed out your site's view on the left-hand side of the screen then that y'all tin see how any changes impact the unabridged layout.
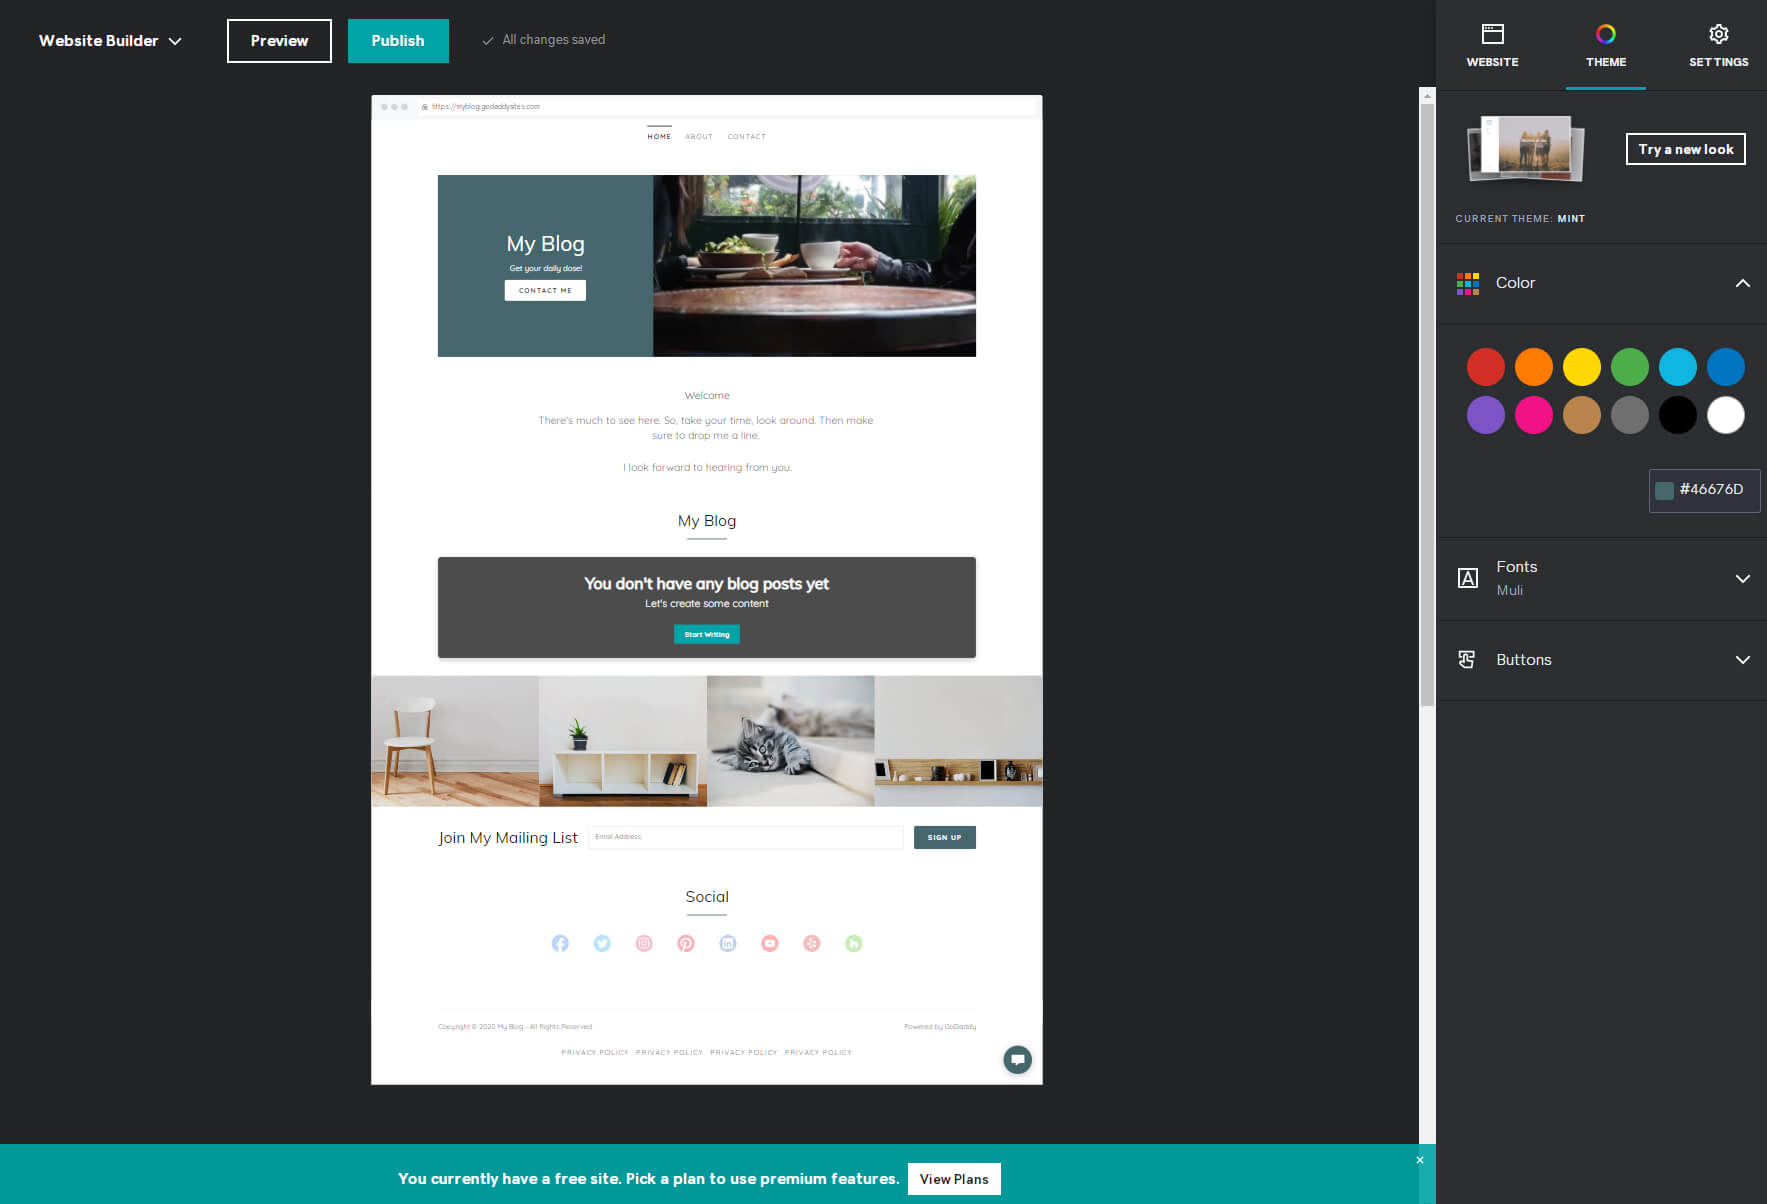
The beginning thing you will see in the options is the current theme that you are using. This is the one GoDaddy selected based on your category. If you lot do not like this theme or only want to see what else is available, click on the "Try a new look" button. There were just over 20 themes bachelor when I tested the editor.
The dandy affair almost this is that the editor automatically loads your current content into all of the other examples when you select them so that you lot can instantly get the vibe of a potential theme.
Yet, don't be afraid to click on a thumbnail you similar, which will bring yous dorsum to the editor. Preview your site, and if you however practise not like it, you tin e'er go back and select a different theme and proceed working on your site without losing any content.
Choose the color of theme
The next step is to choose the color of your theme. This color will affect a few elements of your site, making it the primary site color. Select one of the predefined colors or employ a custom ane by writing a hexadecimal code. Unfortunately, GoDaddy doesn't offer a colour picker, so yous will accept to find your perfect color using a 3rd party color-picker tool and re-create the code here.
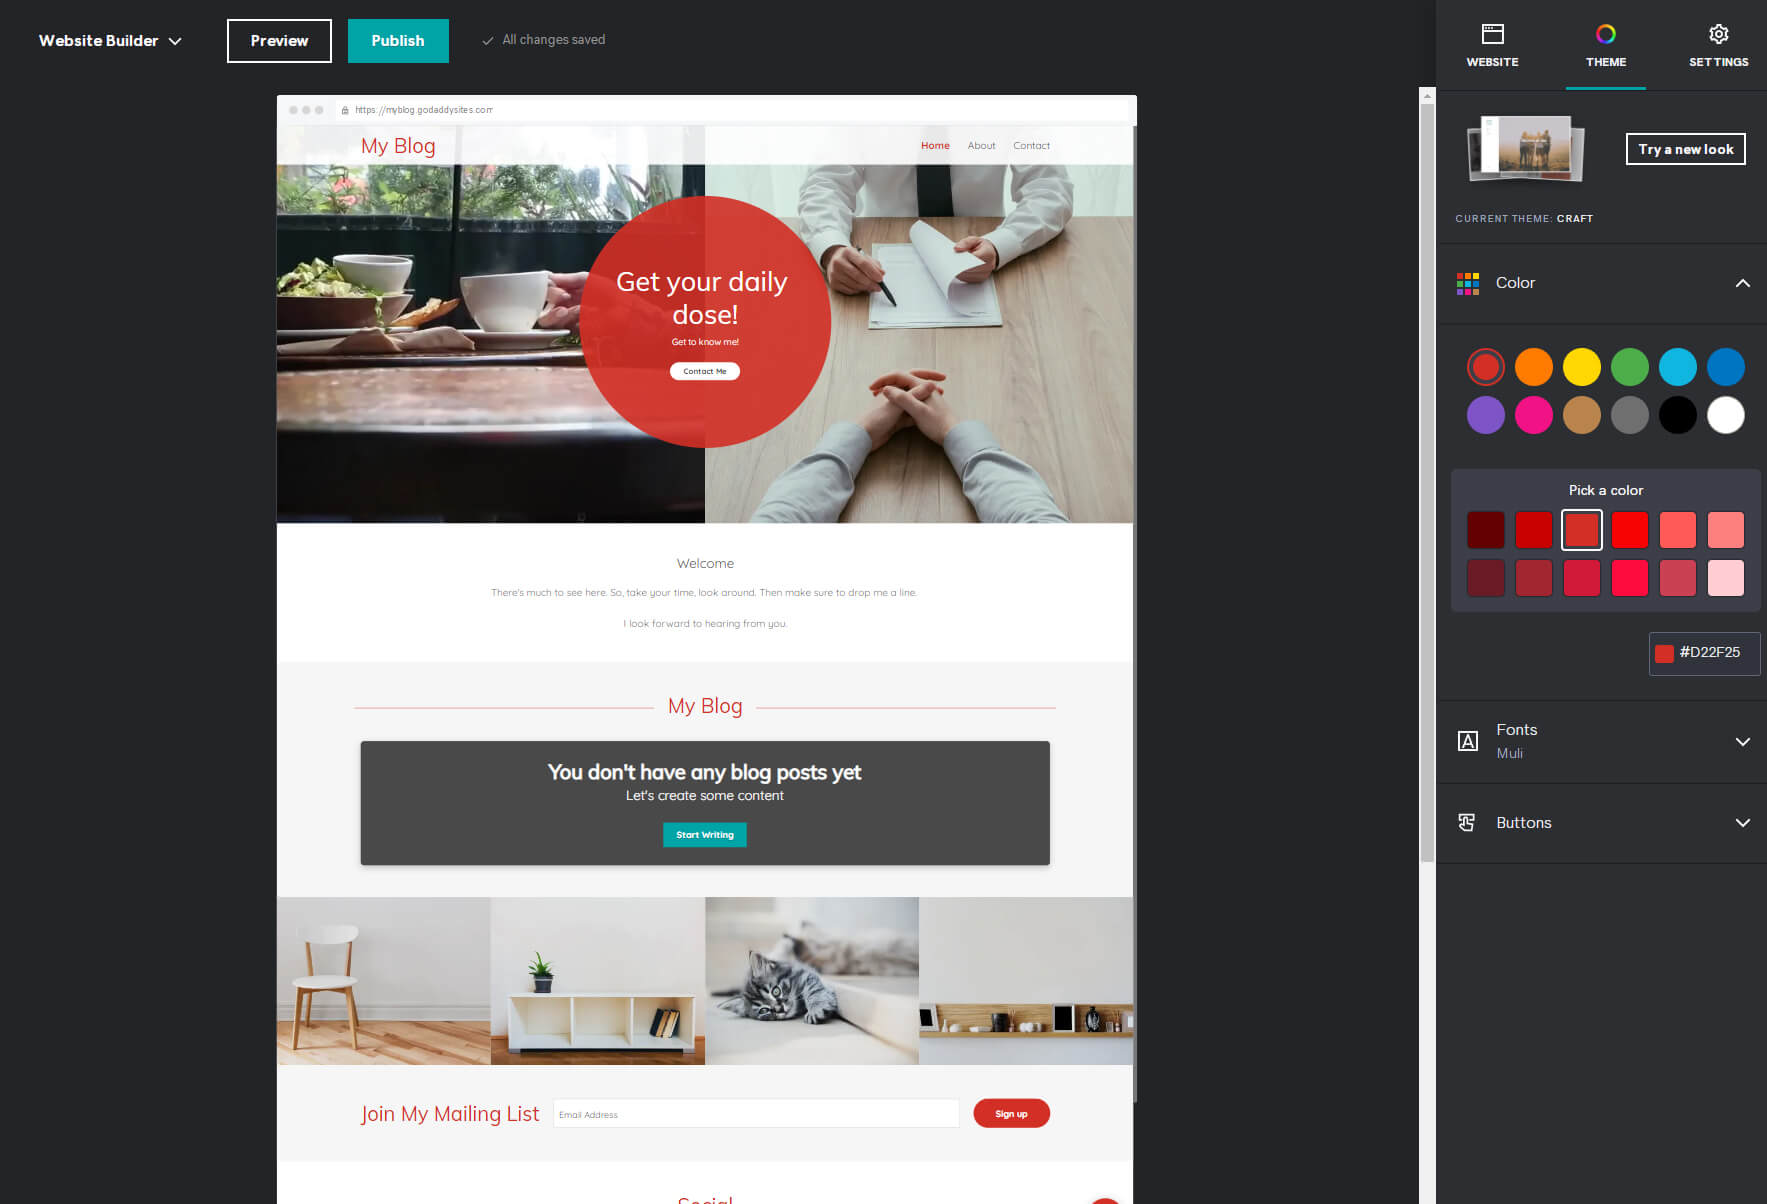
Choose the font and blueprint buttons
To change the fonts on your site, click on the Fonts options beneath. If you're not sure how fonts piece of work or how to pair them correctly, simply choose one of the combinations presented by GoDaddy. There are but a few dozen choices, but I am certain you volition detect one that y'all like. For those more creative types, click on the "advanced" label, and select separate primary and secondary fonts to personalize your site even further.
The final thing to customize here is the buttons. Select the options, and choose the designs of your primary and secondary buttons. By default, the buttons volition use the theme color you selected earlier, but if you lot desire to avoid that, toggle the "Use theme color" switch, and they will turn white.

Once you lot're done customizing the theme, it is time to start making the site more personal. And at that place is no better way to do that than to add images and text.
Add images and texts
From the editor'south top-right corner, choose the "Website" tab to bring your site back into focus. Motion down your site and select elements that contain images and text.
If you select the header department, yous will observe the "Update" push button. Click on it, and the editor will testify you the current image on the correct side of the screen. Here you tin choose to display a background image or video, upload a new photo, and zoom in or out of information technology until it looks just the way you imagined.
When you click on an chemical element that contains text, the editor will load information technology on the screen'southward right-hand side. Here you can change titles, descriptions and write annihilation you lot want. Feel complimentary to browse the other options, and change the layout, emphasis colors, and alignments.
Add together pages and sections
The website you lot currently have in front of you lot is just the sample page the GoDaddy architect created for you. You can e'er remove a department you do not like or demand by selecting the three dots in the selected element's top-right corner. And when you decide to add more content, you lot can easily add together pages and sections.
- Select the "Website" tab from the right-mitt side carte du jour.
- To add a page, click the "Add page" link.
- Select "New page."
- Add a title.
- Determine if you want to bear witness this page in navigation, footer, or brand it private.
- Click on the "Create Page button."
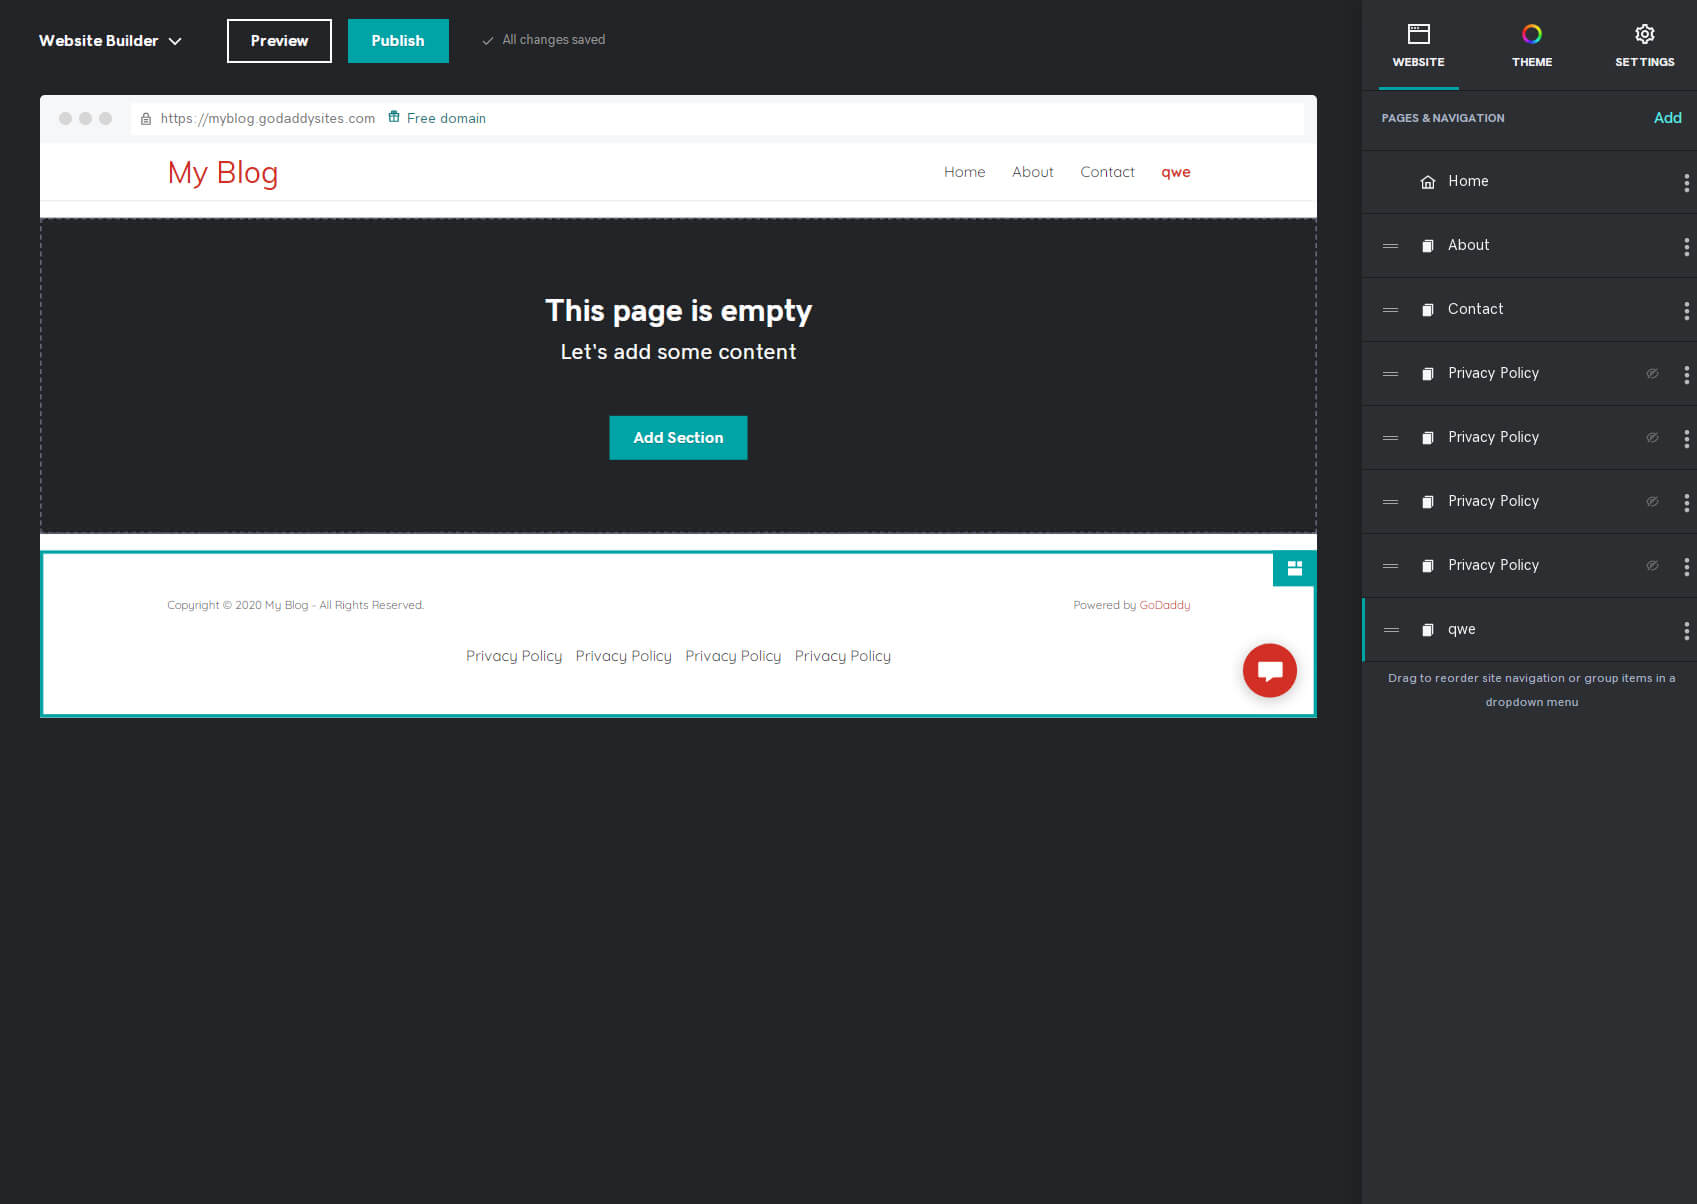
Later on a 2nd or two, y'all will exist able to see the new page loaded into the editor. It will be empty, merely you tin outset adding new sections and content to it.
- To create a new department, click on the "Add Section" push button.
- Choose a section y'all want to add together, like content, photo gallery, video, etc.
- Select the layout of the module you lot like the best.
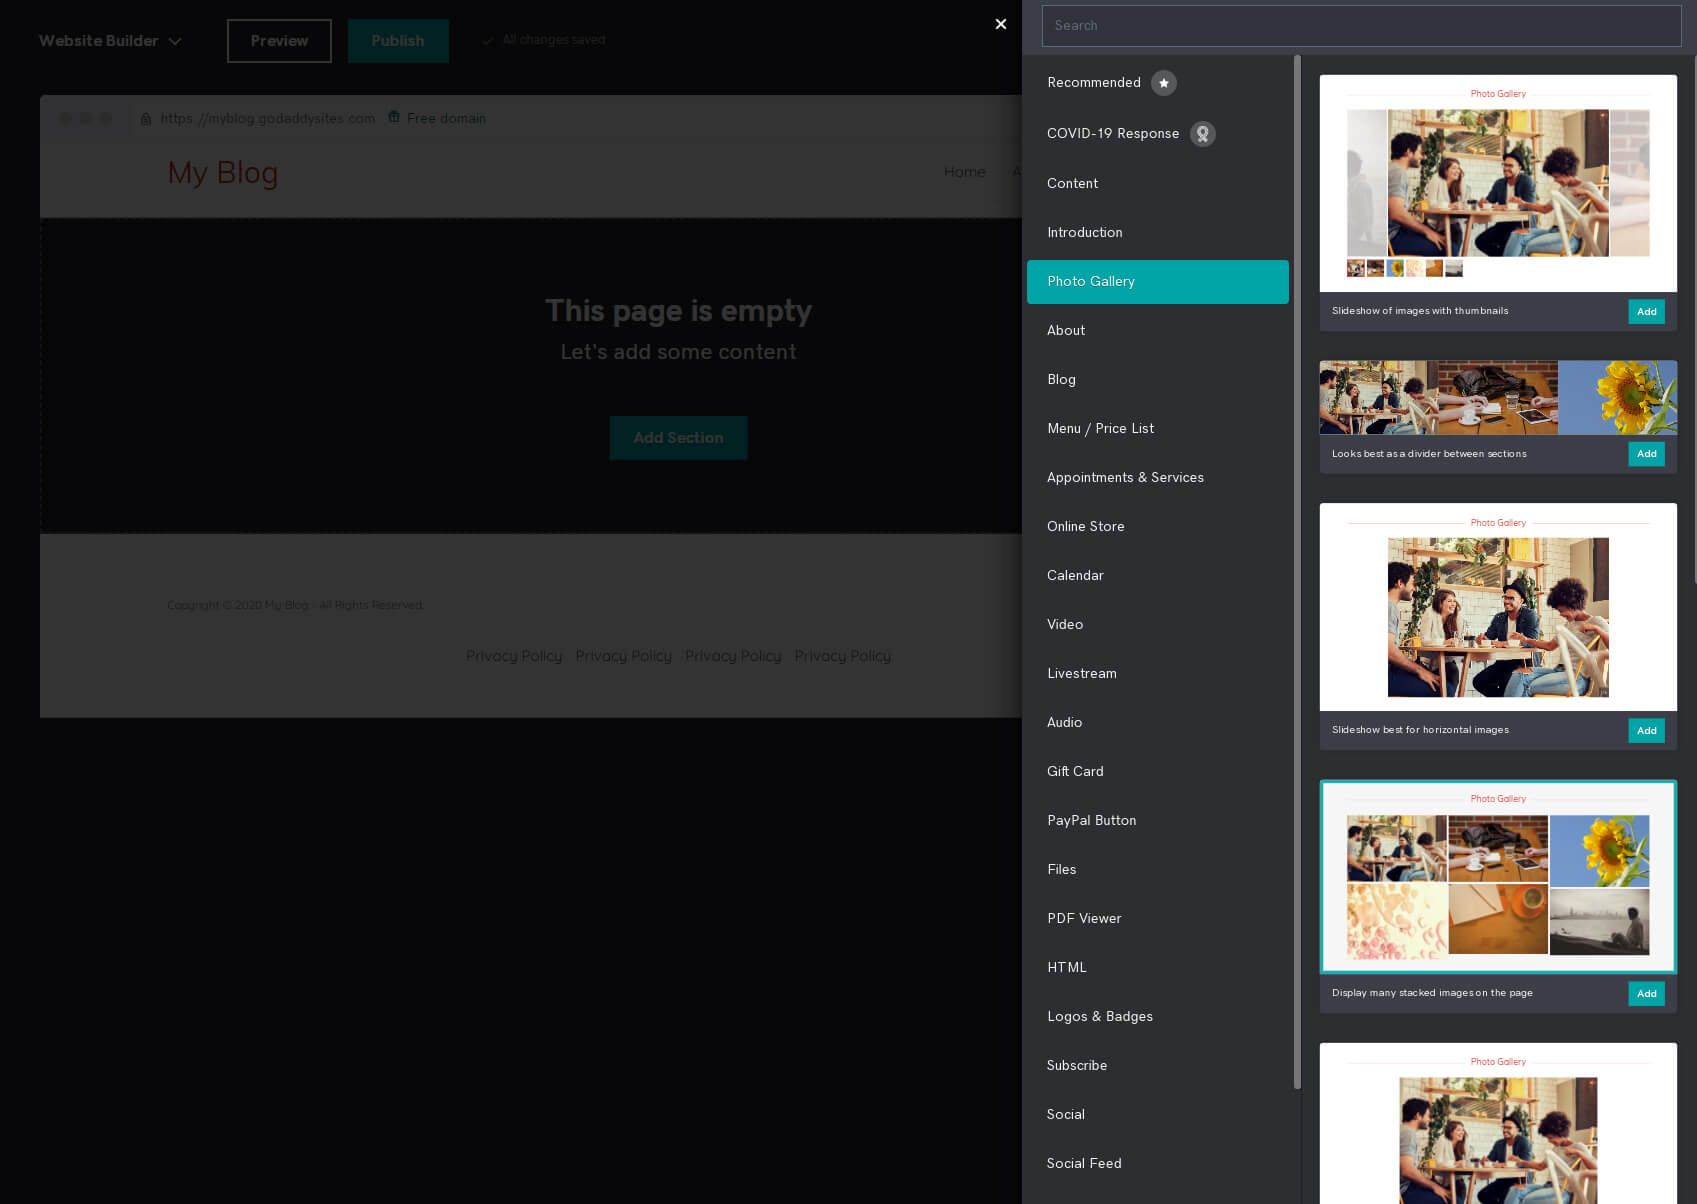
After this, the new section will exist added to your page, and you can continue editing it by clicking on the elements and changing the content.
Review settings
Your website's design is important, only it can't work well without having the right settings to control everything. To modify your site's settings, click on the "Settings" tab from your editor's correct-hand side menu.
- Bones information – change personal info such as the site proper name, concern category, email, your physical address, and telephone number.
- Social media links – add links to your Facebook, Twitter, Instagram, and several other popular social media sites.
- Favicon – upload a custom icon to make your site look more professional. It'south recommended to upload a foursquare image that is 180px by 180px in size.
- Search Engine Optimization – write a few keywords that describe your site. Here, you can write the headline and description of each page on your site.
- Site History – reset your website if necessary or create a backup. You can meet automatic backups that the editor creates when you change a theme or brand more disquisitional changes.
- Cookie Imprint – modify the imprint that informs people about the usage of cookies on your site
- Google Analytics – if you lot have a Google Analytics account, this is the identify to connect it to your GoDaddy website so that you can rail how and when your customers are browsing the site.
- Facebook Pixel – if you want to track your site via Facebook Pixel to know more than most your audience, this is the place to connect it to your website.
- Pinterest Meta tag – if yous're using Pinterest, you can add your meta tag here.
- Google AdSense – to make money with Google AdSense, you lot need to add your AdSense script into this field.
Website add-ons
Too the regular sections y'all can add, GoDaddy allows y'all to add together and control a few more things on your site.
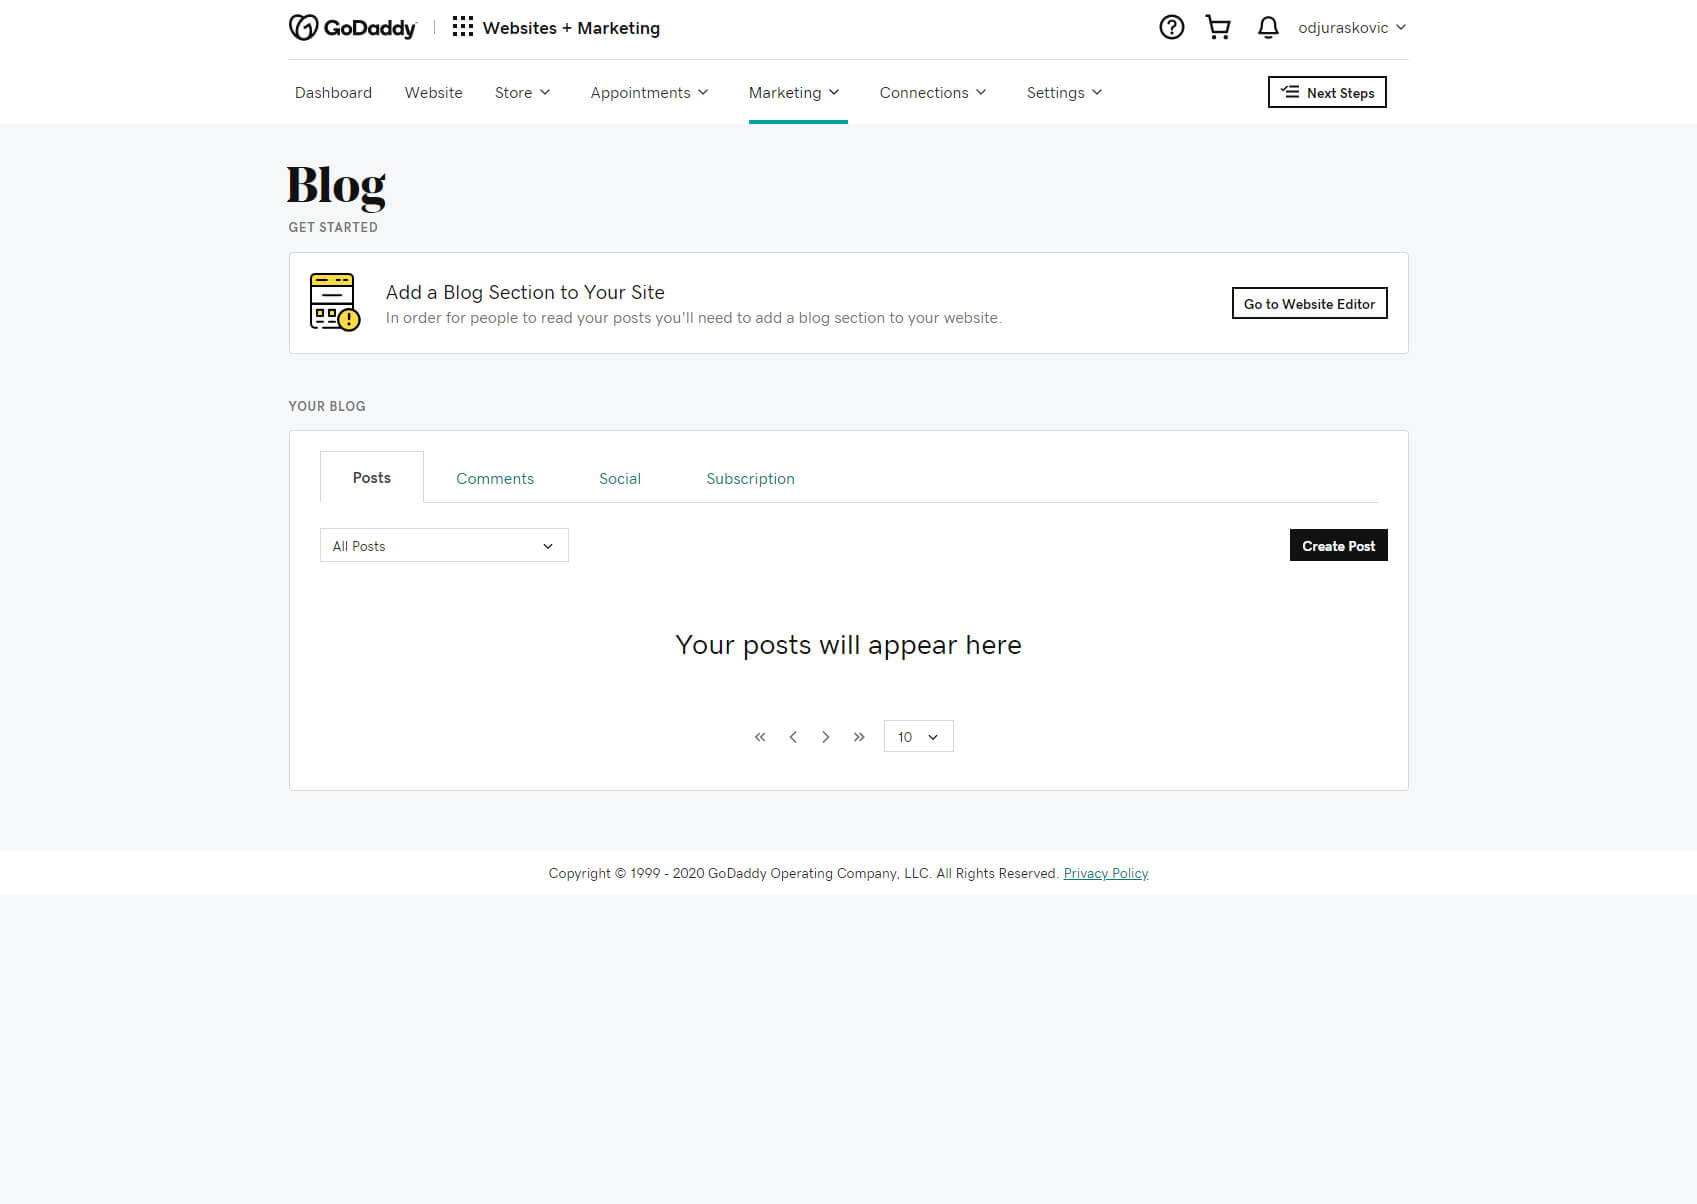
- Blog – this add-on controls your entire blog. This is the place where you can create a new post, manage comments, subscriptions, and everything else dedicated to the blog.
- Messaging – permit visitors contact you directly from the site. If enabled, visitors will see a form they tin use to send you a message. This is likewise the place to customize a welcome and thank you message that will be sent to people who contact you, as well as several other related options.
- Popup – create a popup window that volition be shown to visitors. Add an image to it, change content, and add together action buttons.
Pace #5: Optimize your website for SEO
By this point, you should have a customized site that looks good and contains images & content that brand it personal. Nevertheless, before going public with it, you should still make a few changes that will make your site Google-friendly.
- Open up the "Settings" tab from the top-correct corner of your site.
- Choose "Search Engine Optimization."
- Select a page to modify.
- Write a headline & description.
By describing each page on your site, yous're making it better optimized for Google and other search engines. This gives you a higher take a chance of people finding your content through search engines, and then make certain to describe everything well.
When adding images, you tin can likewise write their descriptions and brand them better for SEO.
Stride #6: Preview and publish your website
At any point, while customizing your site, you lot can see what information technology looks similar. If you lot click on the "Preview" button from the top card, you will see what your website looks similar on a desktop besides as on mobile devices.
This will assistance you lot to brand further changes if necessary and know what visitors will run into when they go to your domain proper noun.
In one case you completely customize the site, you lot tin can publish it and make information technology bachelor to the public past clicking on the "Publish" push button.
Step #vii: Upgrade to connect a custom domain
When starting out, your site will e'er be available at yoursitename.godaddy.com. There's nil wrong about this, just you lot will probably want a custom domain that volition make your site wait better and more professional person.
- Go back to the Dashboard past selecting information technology from the summit-left corner bill of fare.
- Click on the "View Plans" link shown on top.
- Choose a plan you prefer and click "Add to cart."
- Complete the buy.
Available pricing plans
Basic
$9.99 per month if paid yearly
Secure your website, connect a custom domain, mobile-friendly site, on-the-go editing, 24/7 support, business email address free for ane year, PayPal button, 1 social media & list platforms, 5 social posts and responses/month, 100 email marketing sends/month.
Standard
$fourteen.99 per month if paid yearly
Secure your website, connect a custom domain, mobile-friendly site, on-the-go editing, 24/7 back up, business email address complimentary for ane twelvemonth, PayPal button, become plant online (SEO), three social media and listing platforms, 20 social posts and responses/month, 500 electronic mail marketing sends/calendar month.
Premium
$19.99 per month if paid yearly
Secure your website, connect a custom domain, mobile-friendly site, on-the-go editing, 24/vii support, business electronic mail address gratis for one year, PayPal button, get found online (SEO), unlimited social media and listing platforms, unlimited social posts and responses/month, 25000 email marketing sends/month.
eCommerce
$24.99 per month if paid yearly
Secure your website, connect a custom domain, mobile-friendly site, on-the-become editing, 24/7 support, concern electronic mail accost complimentary for one year, PayPal button, get institute online (SEO), unlimited social media and listing platforms, unlimited social posts and responses/calendar month, 25000 email marketing sends/calendar month, e-commerce options.
FAQs
Can I build my own website on GoDaddy for free?
GoDaddy offers a free trial that lets y'all utilise the editor for a calendar month free. However, after this trial menses, you volition take to cull one of their paid plans in order to continue using the service and have your site available online.
Is the GoDaddy website builder adept for SEO?
GoDaddy website builder lets you change only the essential information. While this is enough to become you started, it is not suitable to compete with more serious websites using other website builders. To get more SEO options, y'all will accept to upgrade your plan.
What is better GoDaddy or Wix?
GoDaddy is a expert website builder for people who want to create uncomplicated websites and exercise non wait much from them. Creating a site with GoDaddy tin be done fast, but it lacks a number of features compared to Wix. On the other hand, Wix comes with a drag & drop editor that lets you prove off your creativity and offers and so many more than features that will permit you lot to create a much better website.
Conclusion
If y'all're looking for a elementary website editor that volition allow you to create a simple website, GoDaddy is definitely the right selection. Although it does not have all of the bells and whistles like some competitors do, creating a site with them is fast and simple.
I hope this guide helped you to create your outset GoDaddy website and that you are now more comfortable while exploring all of the features. If you have published your site, don't forget to add a link in the comments below, and show us what yous have made!
Source: https://firstsiteguide.com/how-to-make-godaddy-website/
0 Response to "Free Website Builder That I Can Upload to a Godaddy Domain"
Post a Comment